Oh hi there. Remember me? No? Well I’m the girl that started this blog, I’m also the same girl who went MIA for the past 2 months. Sorry about that! Life happened! Things got busy and it the blog took a nice cozy spot on the back burner!
But now I’m back in action, and so excited to share a bunch of new ideas and recipes with you! I also figured this was the perfect opportunity to give the site a little face lift, I hope you like it!

Friday, July 11, 2014
Friday, May 09, 2014
Caprese Quiché

I have a confession, I used store bought pie shells for this recipe. And I’m not even sorry.
They saved so much time and frustration, and tasted great! This is a quick, delicious meal that will make its way into our weekly rotation. It’s also very versatile in since you can really make any type of quiche you like, ham & cheese, vegetarian etc. It would also make a great breakfast, brunch or lunch option as well.
- 1 frozen pie shell
- 15 cherry tomatoes, halved
- 5-8 fresh basil leaves, torn into small pieces
- 1 cup of mozzarella cheese, shredded
- 4 eggs, beaten
- Salt & Pepper to taste
1. Place the pie shell on a baking sheet, preheat the oven to 350 degrees.
2. Sprinkle about ¼ cup of the cheese on the bottom of the pie shell. Scatter tomatoes, and basil over the cheese on the shell, sprinkle with salt and pepper.
3. Reserve ¼ of the cheese, mix remaining ½ cup of cheese into the egg mixture and pour into the pie shell over the tomatoes and basil. Top with remaining cheese and bake for 25-30 minutes. (Egg should be complete set, pie shell should be golden and flaky and cheese melted and brown)





Wednesday, April 30, 2014
Raspberry Orange Snack Cake

I really, really wanted to make a Raspberry Orange cake (mostly because I needed to use up both before they went bad) but I couldn't find one that I liked, so naturally, I rolled the dice and made one up.
I used my Double Glazed Raspberry Cake Recipe as a guide. The orange zing in the cake makes up for the fact that I left it un-iced/glazed. This turned out to be the perfect summer cake to snack on while the sun is shining!
- 2 cups flour
- 1 tbsp baking powder
- 1/2 tsp salt
- 1 cup sugar
- 1/2 cup butter, softened
- zest from 1 large orange
- 1 egg
- 1 tsp vanilla
- 1/2 cup milk
- 1/2 cup of fresh orange juice
- 3 cups fresh/frozen raspberries
1. Preheat oven to 350 degrees, and grease a round 7'' spring form pan.
2. Cream together butter, egg, sugar, vanilla, milk, orange zest, and juice. Add flour, salt, and baking powder. Mix just until moistened.
3. Spoon batter into pan (it will be thick) and place raspberries on the top of the cake evenly. Bake for 25- 35 minutes or until a toothpick inserted into the center comes out clean. Once cooled, slice into pieces and snack away!

Monday, April 28, 2014
Sneaky Chocolate Zucchini Muffins
.JPG)
I love the idea of sneaking veggies into foods where you wouldn't normally find them. Like last week with the turkey meatballs and this week with these chocolate muffins. I'm afraid I might be giving Andrew some serious trust issues since I don't tell him there was two cups of zucchini in them until after he finished one. ;)
- 1 cup of flour
- 1 cup of whole wheat flour
- 1 1/2 cups of sugar
- 2 cups of zucchini, grated
- 1 cup of cocoa
- 1/2 cup of butter, melted
- 3 eggs
- 1/2 cup of greek yogurt or sour cream
- 1 tsp of vanilla
- 2 tsp of baking soda
- 1 tsp of salt
- 1 1/2 cups of semi-sweet chocolate chips
1. Preheat the oven to 350 degrees, line muffins tins with paper liners. (Recipe makes 20 muffins)
2. Cream together butter and sugar. Add the eggs, vanilla, yogurt/sour cream and zucchini, mix well.
3. Add the flour, cocoa, salt, and baking soda, mix until combined. Stir in the chocolate chips. Spoon the batter into muffin tins so they are 3/4 full. Bake for approx 20 minutes or until toothpick comes out clean.
.JPG)
Thursday, April 24, 2014
Jessica Alba's Turkey Meatballs

If you don’t already know this about me, I like to make large batches of things ahead of time and keep them in the freezer to use at a later time. It makes me feel prepared and saves me a ton of time on weeknights. It’s also nice to make homemade versions of things you might normally buy pre-packaged, this saves you money and is so much better for you.
My childhood mentality always tells me that meatballs belong with pasta, but my health conscious adult mentality respectfully disagrees and thinks they are a lean, versatile protein option that would be great next to a salad. Sorry little one….the big girl wins this round.
- 2 pounds lean ground turkey
- 1 cup panko (Japanese breadcrumbs)*I used brown
- 1/4 cup finely chopped carrots
- 1/4 cup finely chopped zucchini
- 1/4 cup finely chopped onion
- 2 large eggs
- 2 tablespoons Italian seasoning
- 1 tablespoon coarse sea salt
- 2 tablespoons olive oil
- 3/4 cup homemade or store-bought low-sodium chicken broth
1. In a large bowl, mix turkey, panko, carrots, zucchini, onion, eggs, Italian seasoning, and salt until well combined; form into 1-inch balls.

2. Heat olive oil in a large skillet over medium heat. Add meatballs and cook, turning, until browned, about 7 minutes.
3. Add 1/2 cup chicken broth; cover and reduce heat to low. Cook until liquid is almost completely absorbed, about 7 minutes. Add remaining 1/4 cup broth and increase heat to medium; cook, uncovered, until liquid is absorbed. Serve.
Wednesday, April 23, 2014
The BEST Potato Salad

The weather is ever so slowly starting to get nicer and Andrew and I have been anxious to start BBQ-ing and enjoying our new backyard. We decided it was time and fired up the grill, threw on some chicken and I got busy in the kitchen making the potato salad.
Since there’s still snow on the ground (gross I know) and since we don’t yet have a patio set we ate our summer BBQ meal inside. But regardless of the atmosphere we thoroughly enjoyed our dinner and can’t wait to test out some new BBQ recipes this season.
- Bag of small potatoes (I usually get the tri-color one)
- 4 eggs, hard boiled, and chopped
- 2 green onions, chopped finely
- ½ cup of mayo
- ¼ cup of sour cream
- 1 tbsp of mustard (I used Dijon or Hot for a little more flavour)
- Bacon, cooked and sliced (optional – sometimes I do, sometimes I don’t)
- Salt & Pepper to Taste
1. Boil the potatoes until tender, run under cold water. Once cool, slice each potato in half or into quarters depending on size. Put in a large bowl, along with eggs, onions, and bacon (if using) and set aside.
2. In a small bowl, mix together the mayo, sour cream and mustard.
3. Mix the sauce in with the potato mixture until well combined, season with salt in pepper. Refrigerate for at least an hour before serving.
Thursday, April 17, 2014
Apple Cheddar Scones
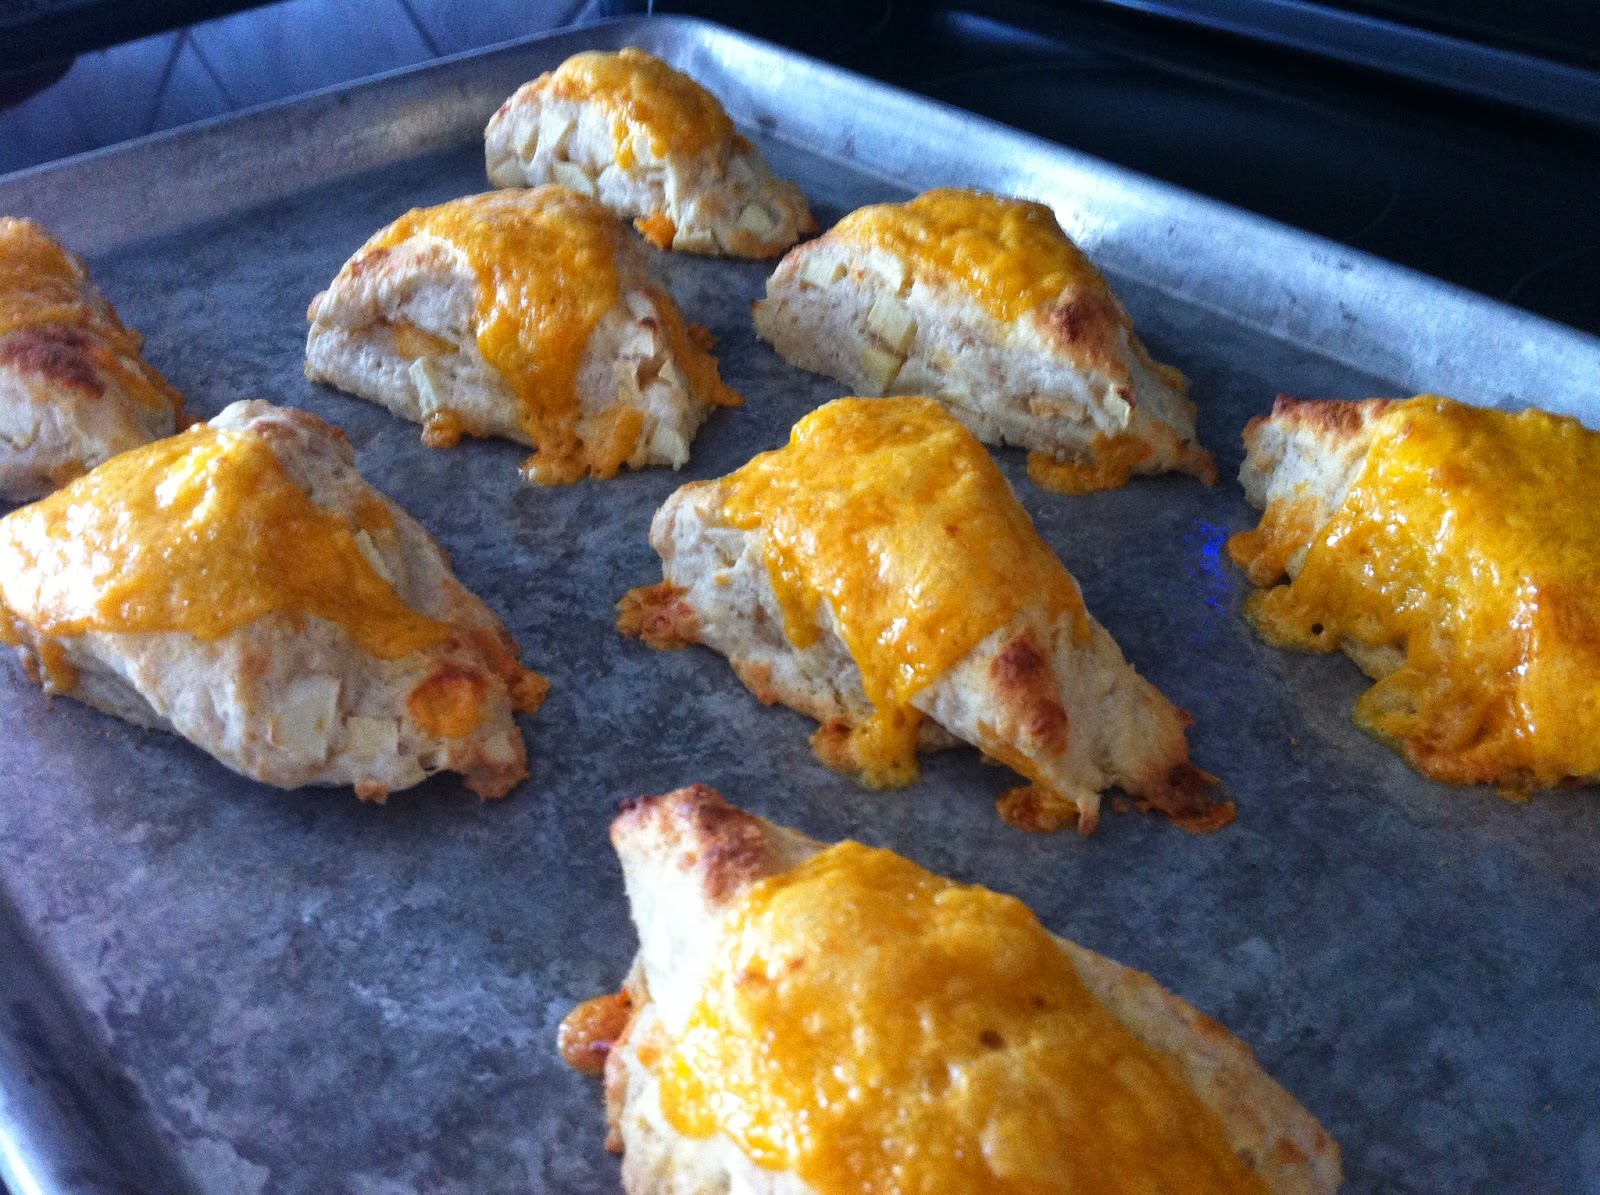
Once I get an idea in my head it stays there. So once some brought up the old apple pie with cheddar cheese combo, I thought about it day and night. Instead of trying my hand at a pie (I’m terrible with pastry) I decided I would just whip some apple cheddar scones. I adjusted my handy versatile scone recipe that use all the time and it worked wonderfully.
- 2 cups of white flour
- 1 tbsp of white sugar
- 1 tsp of baking powder
- ½ tsp of cinnamon
- ½ tsp of salt
- 1 stick of cold butter, cut into cubes
- 2 small apples, peeled and cut into small pieces
- Old cheddar cheese, cut into small cubes + 8 pieces sliced thinly
- 1 cup of buttermilk (make your own by adding 1 tbsp of lemon juice or vinegar)
1. Preheat oven to 350 degrees. Prep a baking sheet with parchment paper or cooking spray.
2. Combine flour, baking powder, sugar, cinnamon, and salt into a large mixing bowl and combine.
3. Toss in the cubes of butter and use your fingers to rub in the butter with the mixture until well combined. It should resemble a course meal.
4. Add the apples and cheese cubes, mix until combined.
6. Pour the buttermilk into the dry mixture then use both your hands to mix them together and form into a ball of dough, then pat into a 8 inch circle about 3/4 inch thick,
7. Cut into 8 triangles, place on the baking sheet and bake, when the scones are golden and almost done, place a piece of cheese on top of each and bake until cheese gets melted and crisp. Approx 18 mins total.
Wednesday, April 16, 2014
Chocolate Dipped Peeps
Simply melt the chocolate chips in the microwave, cut apart each peep and dipped each one. Lay them on wax paper to set.
These little chicks freeze well so they are a great make ahead treat!
Happy Easter Everyone! :)

Monday, April 14, 2014
Mediterranean Garlic Naan Flatbread

During the weeknights buying a store bought crust for pizza or flat-breads is the way to go. I recently started using naan bread and making smaller individual pizzas since it’s fluffy and tasty. For these flat-breads I used garlic naan bread and let me tell you, it made a big difference! It gives this recipe that extra layer of flavor…baked right into the crust.
- 4 pieces of garlic naan bread (2 packages)
- 4 tbsp of pesto or tomato sauce (I made 2 with each)
- 1.5 cups of shredded mozza cheese
- 1 package of cherry tomatoes, sliced in half
- 10 Kalmata Olives, sliced in half
- Fresh Basil, Torn
- 2 Tbsp of fresh Parmesan cheese, grated
- Garlic Salt
2. Spread the pesto or tomato sauce across the crust. Sprinkle ¼ of the cheese onto each. Top with tomatoes, olives and basil and finally the parmesan.
3. Bake for about 15 minutes. The crust should be golden cheese melted. Sprinkle with garlic salt and serve immediately.

Friday, April 11, 2014
Tiramisu
This was my first time making Tiramisu. I will admit, the thought of making it myself as always scared me a little. I think I have always just thought of it as a challenging dessert and veered away from it for that reason. There are recipes that include eggs yolks which I do think are a little more tricky, but after finding a few they mainly have whipping cream and marscapone it seemed a lot more manageable.
Instead of making the Tiramisu in a glass baking dish as you often see. I wanted to do something that looked a little more fancy so I decided to make it in a round spring form pan and place lady finders around the outside. I learned a few things the hard way, but outlined those lessons in my directions so hopefully your dessert experience will run a little smoother.
So be brave and try making a scarey dessert....or least find a less intimidating variation. I think you will be pleasantly surprised.
1. Make a cup of coffee and set aside.
2. Prepare the whipping cream with the sugar and vanilla. Add in the mascarpone cheese and beat until well combined. Add in the Amaretto. At this point I would taste test, if needed, add more sugar, Amaretto etc. I even added about 2 tbsps. of Baileys to enhance the coffee flavor.
3. In a 9 inch spring form pan dollop some of the cream mixture around the outer edge of the bottom of the pan. This will act as the glue to keep the cookies in place. Then stand the cookies up one by one (sugar side out) along the edge of the pan until you have a complete circle. It’s okay if your cookies are longer then the pan, it just means it will be taller…nothing wrong with that! ;)

4. Place a layer of cookies on the bottom of the pan, you may to break a few to cover the space. Using a brush, coat the cookies with the coffee. Don’t drench them otherwise they will get soggy, but make sure they all get a good coat. Then spread a layer of the cream mixture and continue alternating layers (brushing cookies with coffee each time) until you reach the top of the pan or cookie line. Finish with the cream layer. Refrigerate overnight or at least for 4 hours. Dust cocoa powder on the top before serving. (And of course remove the spring form ring)

Instead of making the Tiramisu in a glass baking dish as you often see. I wanted to do something that looked a little more fancy so I decided to make it in a round spring form pan and place lady finders around the outside. I learned a few things the hard way, but outlined those lessons in my directions so hopefully your dessert experience will run a little smoother.
So be brave and try making a scarey dessert....or least find a less intimidating variation. I think you will be pleasantly surprised.
- 4 cups of whipping cream
- 2.5 cups of mascarpone cheese
- 2-3 tbsp of sugar
- 1 tsp of vanilla
- 1/4 cup of Amaretto
- 1 cup of strong coffee, cooled
- 5 packages of ladyfingers
- Cocoa for dusting
1. Make a cup of coffee and set aside.
2. Prepare the whipping cream with the sugar and vanilla. Add in the mascarpone cheese and beat until well combined. Add in the Amaretto. At this point I would taste test, if needed, add more sugar, Amaretto etc. I even added about 2 tbsps. of Baileys to enhance the coffee flavor.
3. In a 9 inch spring form pan dollop some of the cream mixture around the outer edge of the bottom of the pan. This will act as the glue to keep the cookies in place. Then stand the cookies up one by one (sugar side out) along the edge of the pan until you have a complete circle. It’s okay if your cookies are longer then the pan, it just means it will be taller…nothing wrong with that! ;)
4. Place a layer of cookies on the bottom of the pan, you may to break a few to cover the space. Using a brush, coat the cookies with the coffee. Don’t drench them otherwise they will get soggy, but make sure they all get a good coat. Then spread a layer of the cream mixture and continue alternating layers (brushing cookies with coffee each time) until you reach the top of the pan or cookie line. Finish with the cream layer. Refrigerate overnight or at least for 4 hours. Dust cocoa powder on the top before serving. (And of course remove the spring form ring)
Wednesday, April 09, 2014
Chicken with Sage and Prosciutto & Parmesan Risotto

This is one of those great meals that is really impressive to dinner guests but takes hardly and time and effort. My Step mother made this years ago along and has ever since been one of my all time fav meals! The two actually go great together because the chicken can be in the oven while you’re stirring the risotto as it requires constant attention. I decided to make a salad to go along with it as I could make it ahead of time. Even though I’m a great multitask-er, I hate to chance it when company’s coming. ;)
Chicken with Sage & Prosciutto
- 4 chicken breasts, on the bone with skin on
- 6 pieces of prosciutto
- 4 fresh sage leaves
- Olive oil
- Salt & pepper
1. Prepare the chicken by sliding your fingers under the skin so that you create a flap, with it still attached on the side with the bone. Place a piece and a half of prosciutto on top of the chicken, under the skin along with a sage leave and place the skin on top.
2. Place the chicken in the glass baking dish, brush with olive oil and season with salt and pepper.
3. Bake at 400 degrees for approx. 50 mins or until chicken is brown and the juices run clear when pierced with a fork. Let sit for 5 minutes before serving.
Parmesan Risotto
- 6 cups of chicken stock
- ¼ cup of olive oil
- ½ cup of onion, finely chopped
- 2 cups of Arborio rice
- 1 cup of white wine
- 1 tbsp of butter
- Parmesan cheese, grated
- Salt & Pepper
1. In a large pot bring the chicken stock to a simmer. Keep on very low heat so it stays warm.
2. In a large saucepan, heat the oil and saute the onion until translucent. Add in the rice, stir until all the grains are coated, and they turn translucent with a white dot in the center.
3. Add the wine and cook until absorbed, stirring constantly. Then add a ladleful of the chicken stock, stir frequently until absorbed, and continue this process for about 20 minutes. The rice should be creamy and tender, but still slightly firm on the inside.
4. Remove from heat and add the butter and parmesan cheese. Serve immediately. Makes 4 – 6 servings.
Tuesday, April 08, 2014
Fruit n Nut Chocolate Clusters

The fact that these are easy to make is a bad thing. They are so good! I could totally see myself whipping up a batch every time I get a chocolate craving. But if you can limit yourself to just one they do make a nice little dessert that is better for you than the average chocolate.
- 2 cups of semi-sweet chocolate chips
- Unsalted almonds
- Unsalted walnuts
- Dried Cherries
- Dried Blueberries
1. Put the chocolate chips in a medium sized bowl. Microwave for 2-3 minutes, taking out to stir every 30 seconds or so. The chocolate should be smooth and glossy when ready. Do not over heat or the chocolate could seize.
2. Place a sheet of wax paper on a cookie sheet, and drop small spoonful’s of the melted chocolate onto it. You should have about 16 morsels. Then place the almonds, walnuts, cherries, and blueberries on top as desired.
3. Set in the fridge or freezer until ready to consume. Store in an air tight container with wax paper in between layers.